Chapter 2. Colocation of Containerized Ceph Daemons
This section describes:
2.1. How colocation works and its advantages
You can colocate containerized Ceph daemons on the same node. Here are the advantages of colocating some of Ceph’s services:
- Significant improvement in total cost of ownership (TCO) at small scale
- Reduction from six nodes to three for the minimum configuration
- Easier upgrade
- Better resource isolation
How Colocation Works
You can colocate one daemon from the following list with an OSD daemon by adding the same node to appropriate sections in the Ansible inventory file.
-
The Ceph Object Gateway (
radosgw) - Metadata Server (MDS)
-
RBD mirror (
rbd-mirror) -
Monitor and the Ceph Manager daemon (
ceph-mgr) - NFS Ganesha
The following example shows how the inventory file with colocated daemons can look like:
Example 2.1. Ansible inventory file with colocated daemons
[mons]
<hostname1>
<hostname2>
<hostname3>

[mgrs]
<hostname1>
<hostname2>
<hostname3>

[osds]
<hostname4>
<hostname5>
<hostname6>

[rgws]
<hostname4>
<hostname5>
[mons]
<hostname1>
<hostname2>
<hostname3>

[mgrs]
<hostname1>
<hostname2>
<hostname3>

[osds]
<hostname4>
<hostname5>
<hostname6>

[rgws]
<hostname4>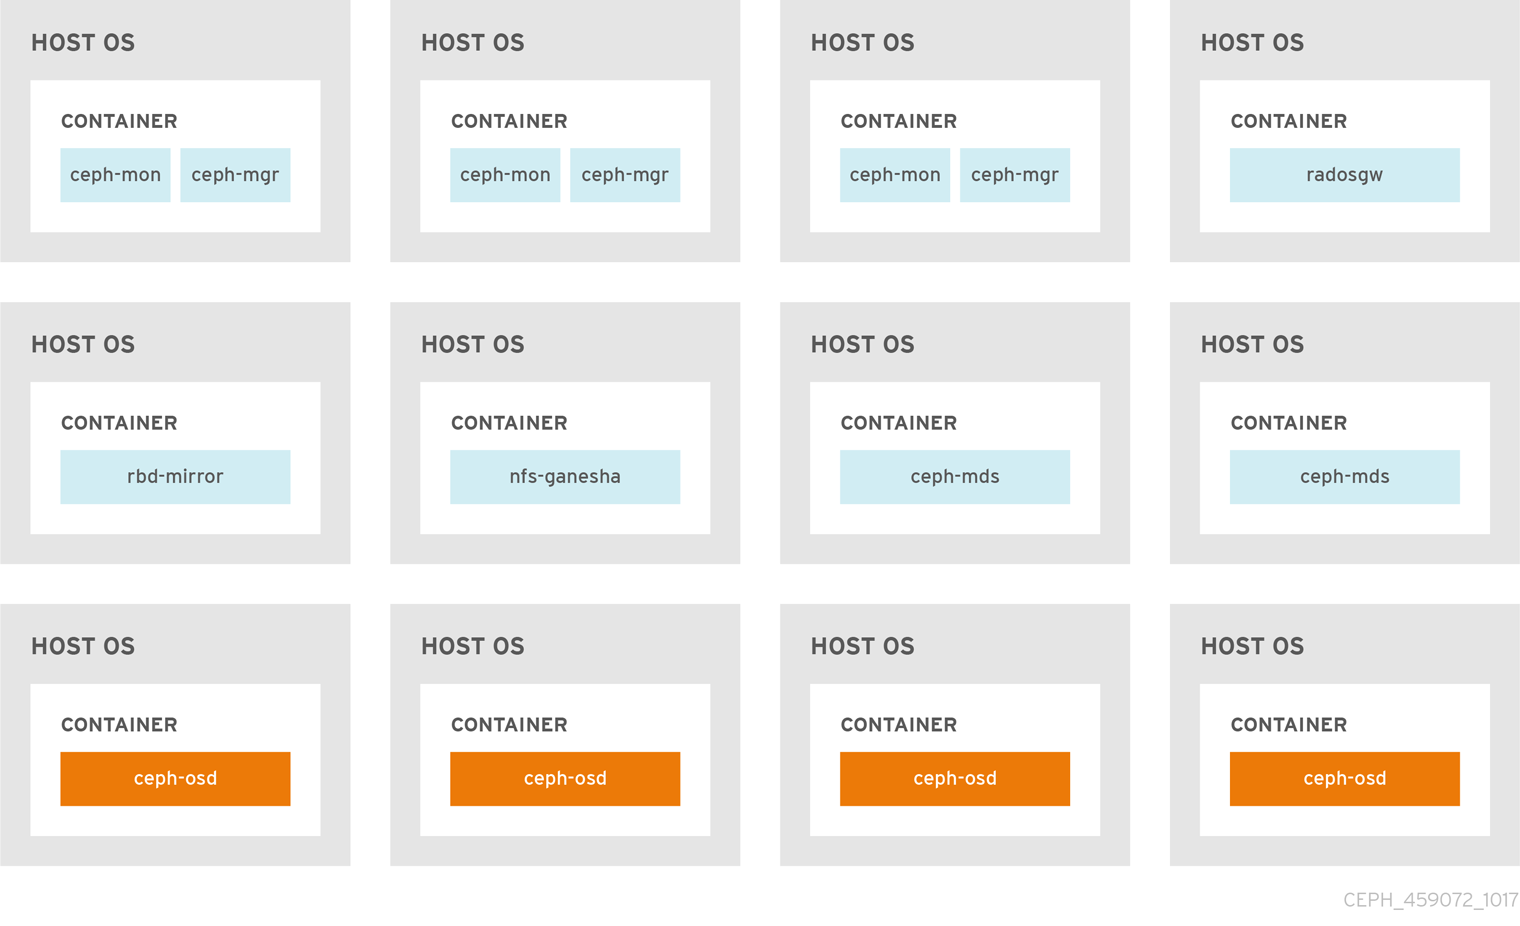
<hostname5>The Figure 2.1, “Colocated Daemons” and Figure 2.2, “Non-colocated Daemons” images shows the difference between clusters with colocated and non-colocated daemons.
Figure 2.1. Colocated Daemons
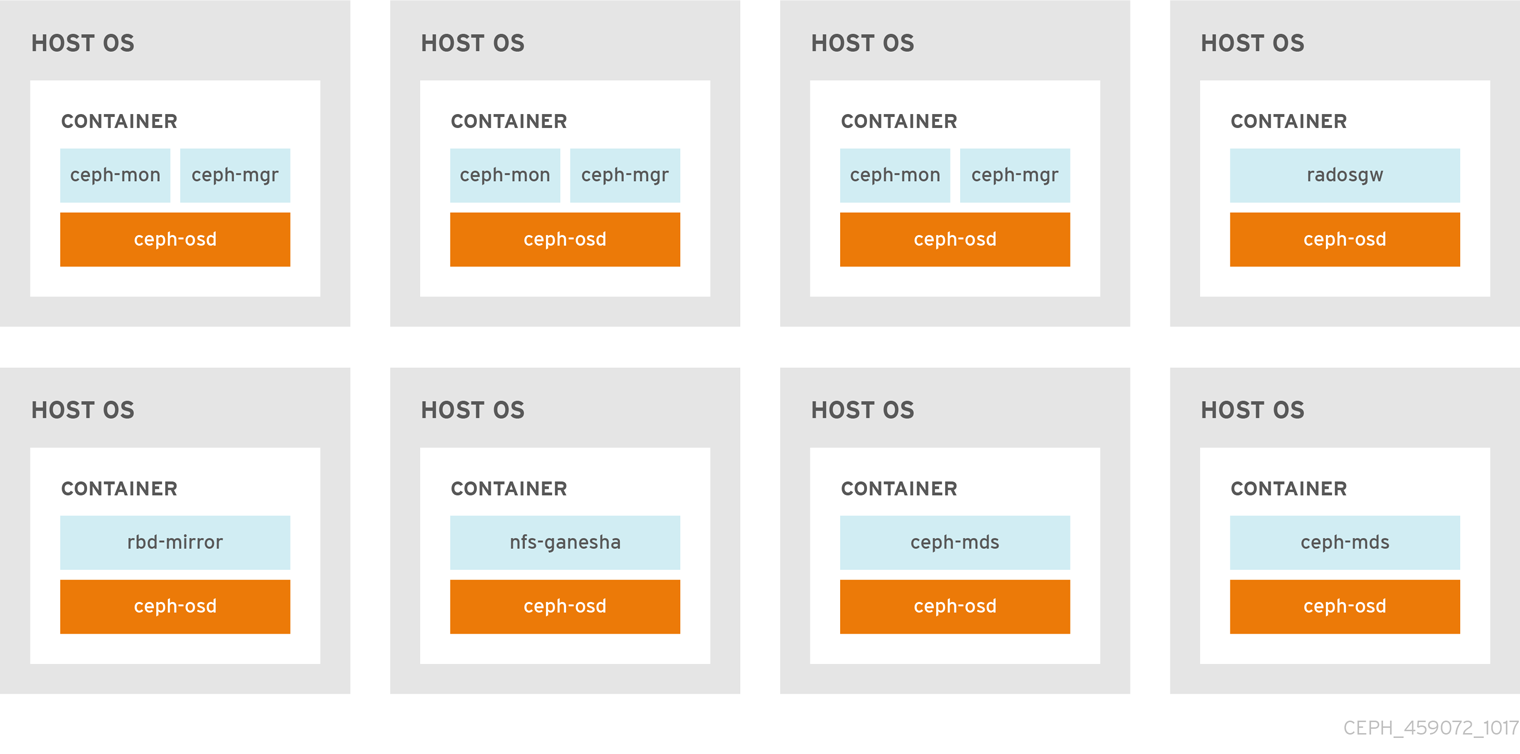
Figure 2.2. Non-colocated Daemons
When you colocate two containerized Ceph daemons on a same node, the ceph-ansible playbook reserves dedicated CPU and RAM resources to each. By default, ceph-ansible uses values listed in the Recommended Minimum Hardware chapter in the Red Hat Ceph Storage Hardware Selection Guide 3. To learn how to change the default values, see the Setting Dedicated Resources for Colocated Daemons section.
2.2. Setting Dedicated Resources for Colocated Daemons
When colocating two Ceph daemon on the same node, the ceph-ansible playbook reserves CPU and RAM resources for each daemon. The default values that ceph-ansible uses are listed in the Recommended Minimum Hardware chapter in the Red Hat Ceph Storage Hardware Selection Guide. To change the default values, set the needed parameters when deploying Ceph daemons.
Procedure
To change the default CPU limit for a daemon, set the
ceph_daemon-type_docker_cpu_limitparameter in the appropriate.ymlconfiguration file when deploying the daemon. See the following table for details.Daemon Parameter Configuration file OSD
ceph_osd_docker_cpu_limitosds.ymlMDS
ceph_mds_docker_cpu_limitmdss.ymlRGW
ceph_rgw_docker_cpu_limitrgws.ymlFor example, to change the default CPU limit to 2 for the Ceph Object Gateway, edit the
/usr/share/ceph-ansible/group_vars/rgws.ymlfile as follows:ceph_rgw_docker_cpu_limit: 2
ceph_rgw_docker_cpu_limit: 2Copy to Clipboard Copied! To change the default RAM for OSD daemons, set the
osd_memory_targetin the/usr/share/ceph-ansible/group_vars/all.ymlfile when deploying the daemon. For example, to limit the OSD RAM to 6 GB:ceph_conf_overrides: osd: osd_memory_target=6000000000ceph_conf_overrides: osd: osd_memory_target=6000000000Copy to Clipboard Copied! ImportantIn an hyperconverged infrastructure (HCI) configuration, using the
osd_memory_targetparameter is the recommended way to limit memory of OSDs. Theceph_osd_docker_memory_limitparameter should not be necessary, but if you wish to use it, then setceph_osd_docker_memory_limitto 50% higher thanosd_memory_target, so that the CGroup limit is more constraining than it is by default for an HCI configuration. For example, ifosd_memory_targetis set to 6 GB, setceph_osd_docker_memory_limitto 9 GB:ceph_osd_docker_memory_limit: 9g
ceph_osd_docker_memory_limit: 9gCopy to Clipboard Copied!
The ceph_osd_docker_memory_limit parameter sets a hard limit. If the value is exceeded, the OSD can stop running if it is used. The osd_memory_target parameter sets a soft limit so the container will not stop running and interrupt service if the value is exceeded.
Additional Resources
-
The sample configuration files in the
/usr/share/ceph-ansible/group_vars/directory